Sunlounger
Calibrating & Integrating the Light Frames
These following steps are for working with a mono camera using either LRGB or narrowband filters
Having generated all the necessary calibration frames, the light frames can now be processed. Here's a tip — run the 'Blink' process after each step to check that the processes are doing what's expected. I've had two examples that have been highlighted this way. Firstly when I tried using the WBPP on a set of images I ended up with some having a 'checkerboard' pattern and I was only able to identify the culprit when I manually processed the same frames and discovered it was the 'Star Alignment' process (specifically the interpolation algorithm was causing the problem). The second instance again arose during the registration process when one frame (out of 85) was not aligned with the rest, despite the process reporting that all images were successfully processed
1 — Calibration
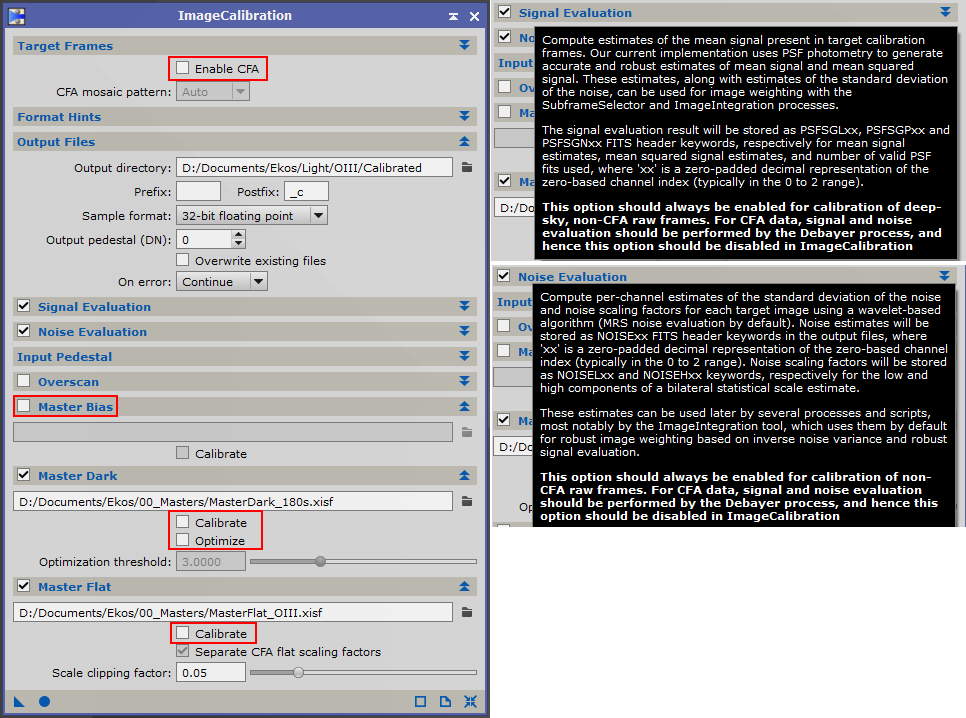
Once light frames have been added under 'Target Frames', select an output directory under 'Output Files' then make the following changes to the default settings:
- 'Enable CFA' : de–select
- 'Master Bias' : de–select
- Under 'Master Dark' ensure 'Calibrate' and 'Optimize' are de-selected
- Under 'Master Flat' ensure 'Calibrate' is de-selected
2 — Cosmetic Correction
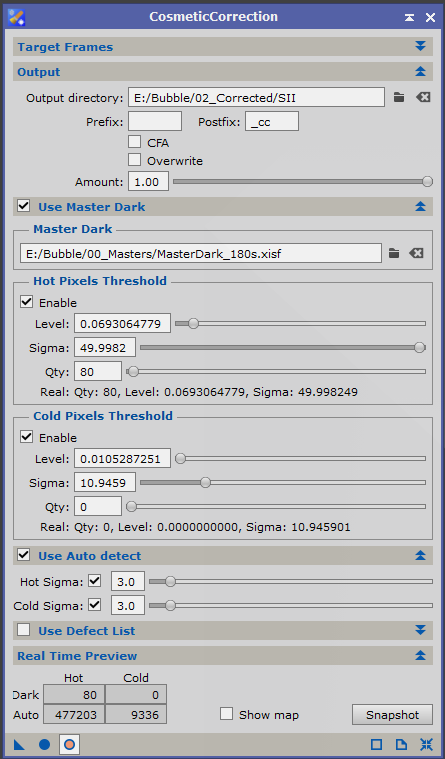
After calibration, cosmetic correction is applied to remove any hot and cold pixels. All calibrated frames can be added under 'Target Frames' at the same time, but they will all be output into a single folder. I prefer to correct the light frames from each filter separately so they can be written to individual folders ready for further processing. The number of corrected pixels can be seen in the 'Real Time Preview' section by enabling real time preview and adjusting the sliders
3 — Approval & Weighting
The process for this is 'SubframeSelector'. The first step is to load the frames under 'Subframes', select 'Measure Subframes' under 'Routine:' and 'Apply Global (F6)'
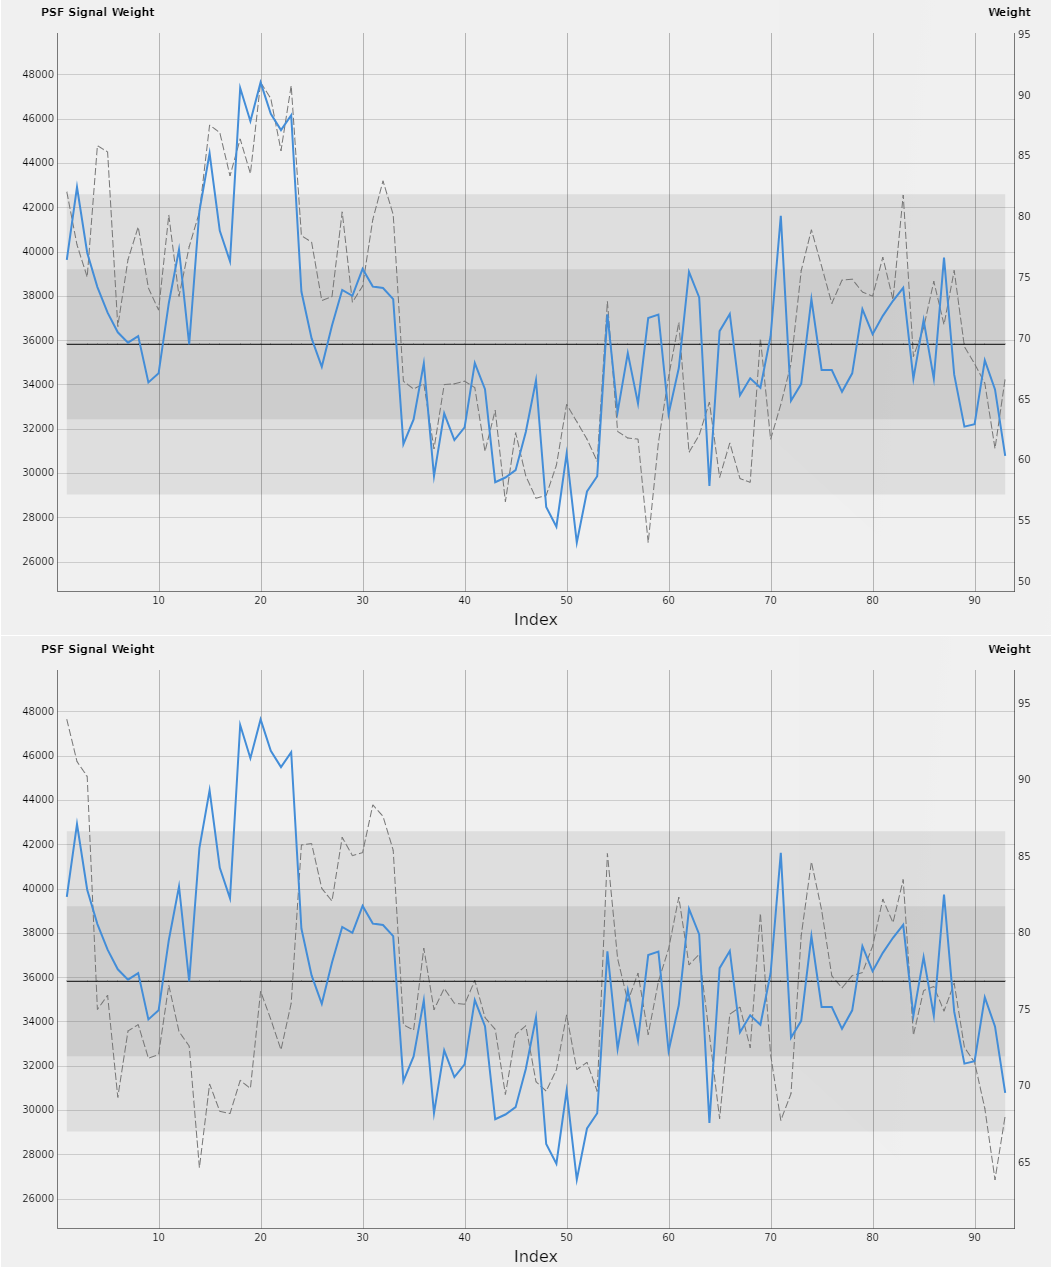
To estimate the comparative quality of a set of light frames, 'SubframeSelector' has an option to use weighting expressions that allows various parameters to be compared for each frame. PixInsight version 1.8.8-10 introduced a couple of new weighting algorithms — 'PSF Signal' and 'PSF Power'. The graphs here show a comparison of two common types of weighting expression (shown as the dotted grey line) against the new 'PSF Signal Weight' shown in blue. The upper graph uses a 'star' weighted expression:
(15*(1-(FWHM-FWHMMin)/(FWHMMax-FWHMMin)) + 20*(1-(Eccentricity-EccentricityMin)/(EccentricityMax-EccentricityMin)) +
              15*(Stars-StarsMin)/(StarsMax-StarsMin))+50
and the lower uses an SNR weighted expression:
(15*(1-(FWHM-FWHMMin)/(FWHMMax-FWHMMin)) + 15*(1-(Eccentricity-EccentricityMin)/(EccentricityMax-EccentricityMin)) +
              20*(SNRWeight-SNRWeightMin)/(SNRWeightMax-SNRWeightMin))+50
Clicking on a graph point or clicking on the 'tick mark' against a frame in the 'Measurements Table' selects that frame to be excluded from further processing, but low quality / low weight frames can also be excluded by using an approval expression in the 'SubframeSelector | Expressions' dialog
Once the low quality frames have been excluded the remainder can be saved in a separate folder — select 'Output Subframes' under 'Routine:', choose the destination folder under 'Output Files' and 'Apply Global (F6)'. The weight value for each frame is stored in the FITS header with the SSWEIGHT keyword
4 — Star Alignment / Registration
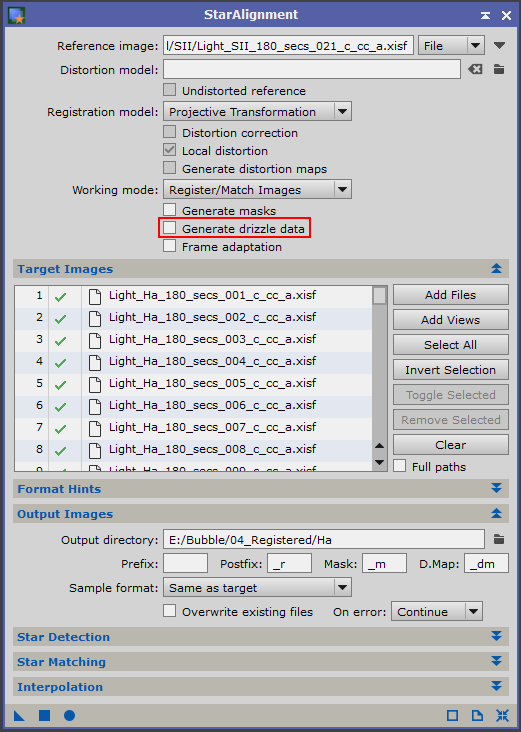
Select a good quality image generated during the previous approval process as the reference image. This image is used as a reference for all the different filters.
All the light frames can be registered together, but then they will all be saved into the same folder. I prefer to correct the light frames from each filter separately so they can be written to individual folders ready for further processing.
Also note the comments I've made at the top of the page — changing the interpolation algorithm may be needed
Uncheck 'Generate drizzle data' unless intending creating a drizzled master frame
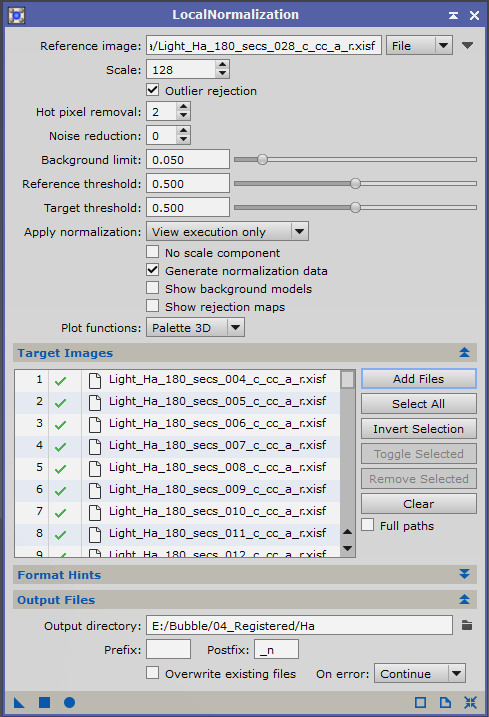
5 — Normalization
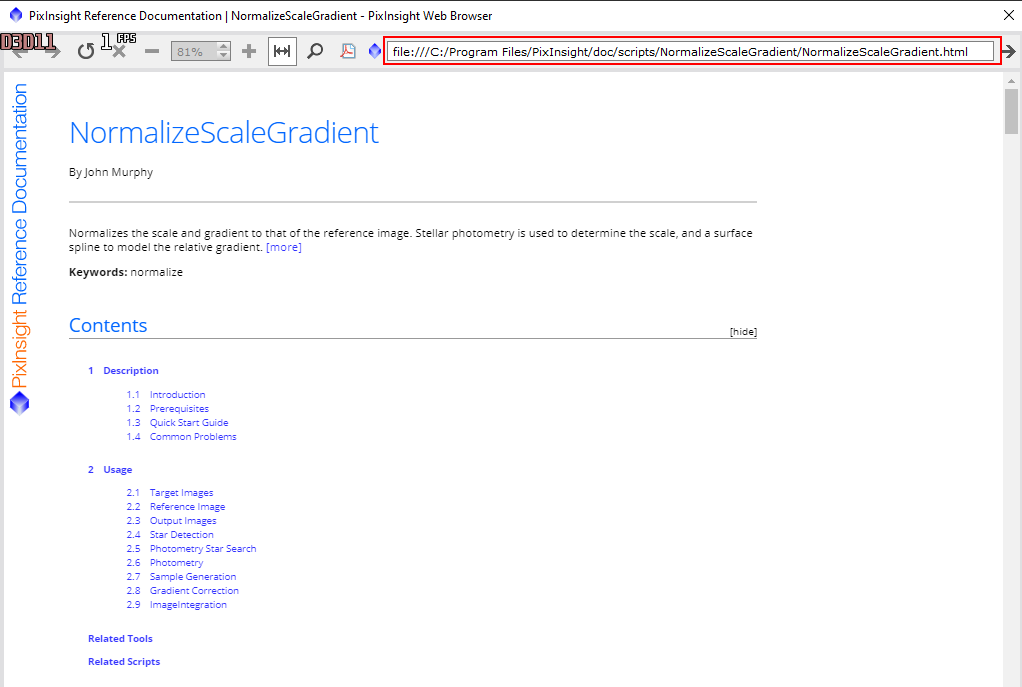
Local normalization is an optional step in the pre-processing workflow that corrects the illumination of an image so all images are statistically matched before integration, and is not really recommended unless the light frames have excessive gradients. Local normalization has commonly been carried out using the 'Local Normaliztion' process, but it now looks as though it is being superseded by the 'NormalizeScaleGradient' script. There are a number of steps to go through when using this script and the best resources are the the discussion on the PixInsight forum and the documentation included with the script. It's useful to paste the documentation link into your browser to refer to while working your way through it as you can't work with the script parameters while the documentation window is open.
Once the script completes, it opens the 'Image Integration' process with the correct options pre–selected
Selecting a reference image can be tricky — a member of the PixInsight team recommends a carefully DBE'd integrated master image. One option is to create this integrated master image by integrating the best 10 to 20% of the registered frames
When using the 'LocalNormalization' process:
- After adding the target images (each filter is dealt with separately):
- Under 'Reference image' : select the image created as above
- the output directory should be the same as the directory storing the target images
6 — Integration
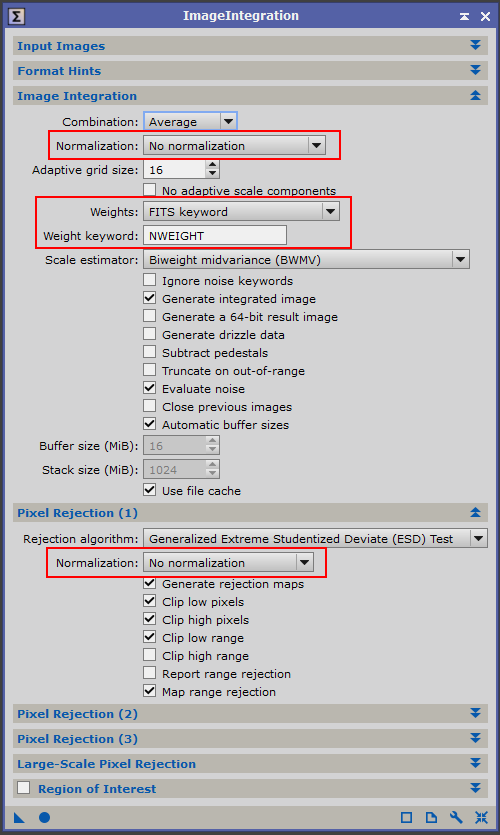
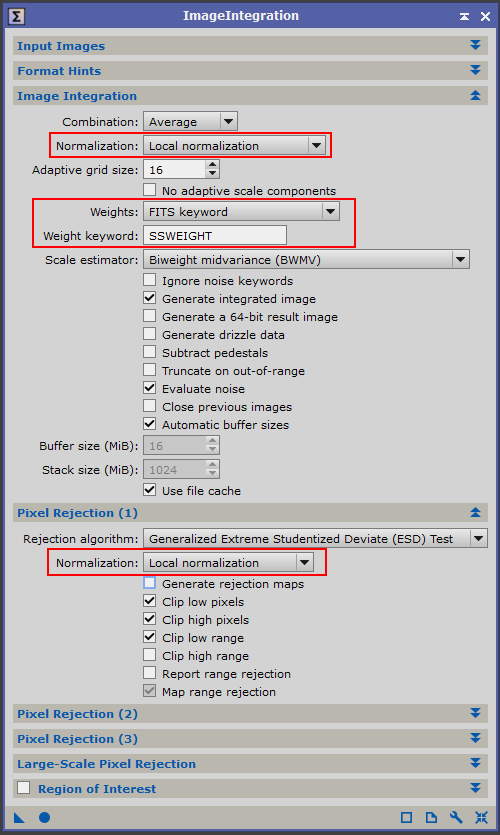
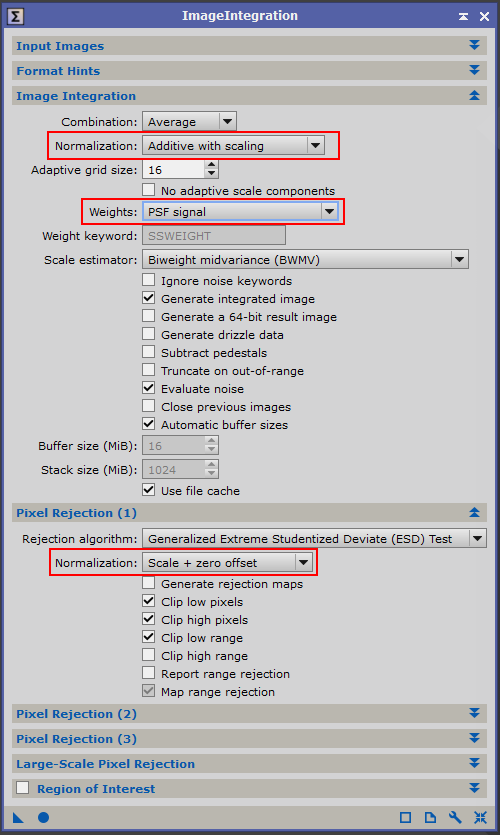
The 'Image Integration' process is the final step in creating the master images
If the 'NormalizeScaleGradient' script has been used, then the 'ImageIntegration' dialog will be ready to run as shown on the left
If the 'LocalNormalization' process has been used, then the local normalization files need to be added under the 'Input images' section and 'Local normalization' selected in both the 'Image Integration' and 'Pixel Rejection (1)' sections.
When no local normalization has been done, then 'Additive with scaling' should be selected under 'Image Integration' and 'Scale + zero offset' under 'Pixel Rejection (1)'
With the introduction of the new weighting methods in version 1.8.8-10 the old methods (see the middle image) are becoming less relevant and the new methods don't depend on a reference image. Actually, the concept of reference image no longer exists in the ImageIntegration process for image weighting (see here)
7 — Cropping
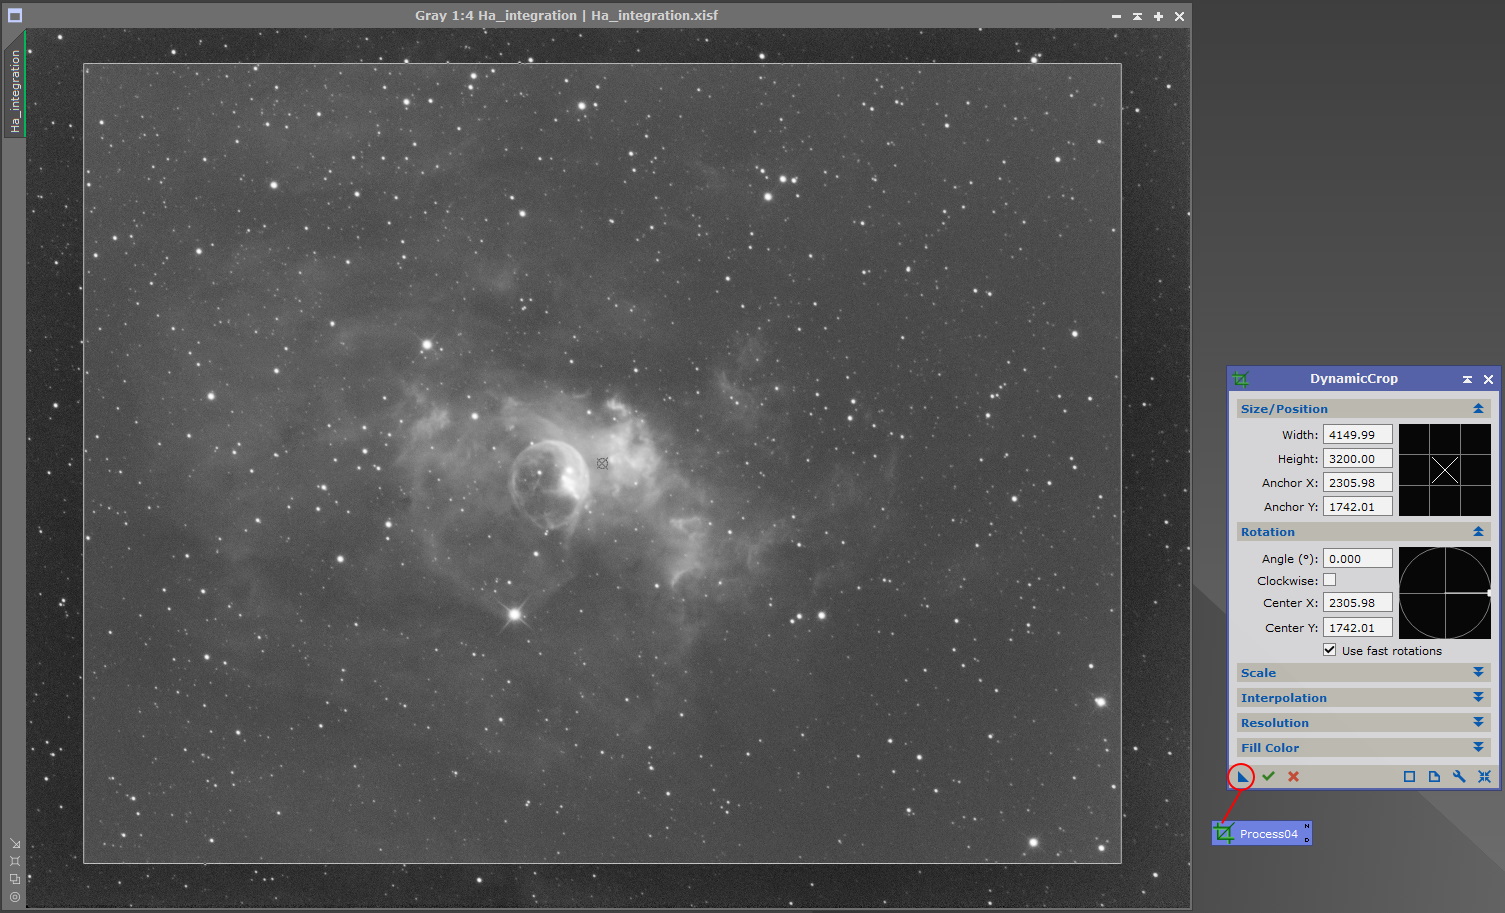
Now the individual frames have been integrated, it's necessary to crop the resulting master frames to get rid of the dark areas around the edges that have resulted from the stacking process — star alignment causes each frame to be slightly re–aligned / rotated compared to the reference, leaving a dark border
Study the master frames to decide which needs the most cropping, and then drag the crop box over the image. If necessary the box can be resized, moved or rotated until you have a suitable area selected. Once satisfied, create a new instance icon by dragging the blue triangle (in the bottom left of the process dialog) onto the workspace before clicking on the green tick mark to execute the crop.
Close the 'DynamicCrop' dialog and double click the new instance icon to open another instance and repeat the crop on all the master images. All the master images will now align with each other.