Sunlounger
Cleaning & Combining Individual Filter Master Frames
1 — Removing light gradients
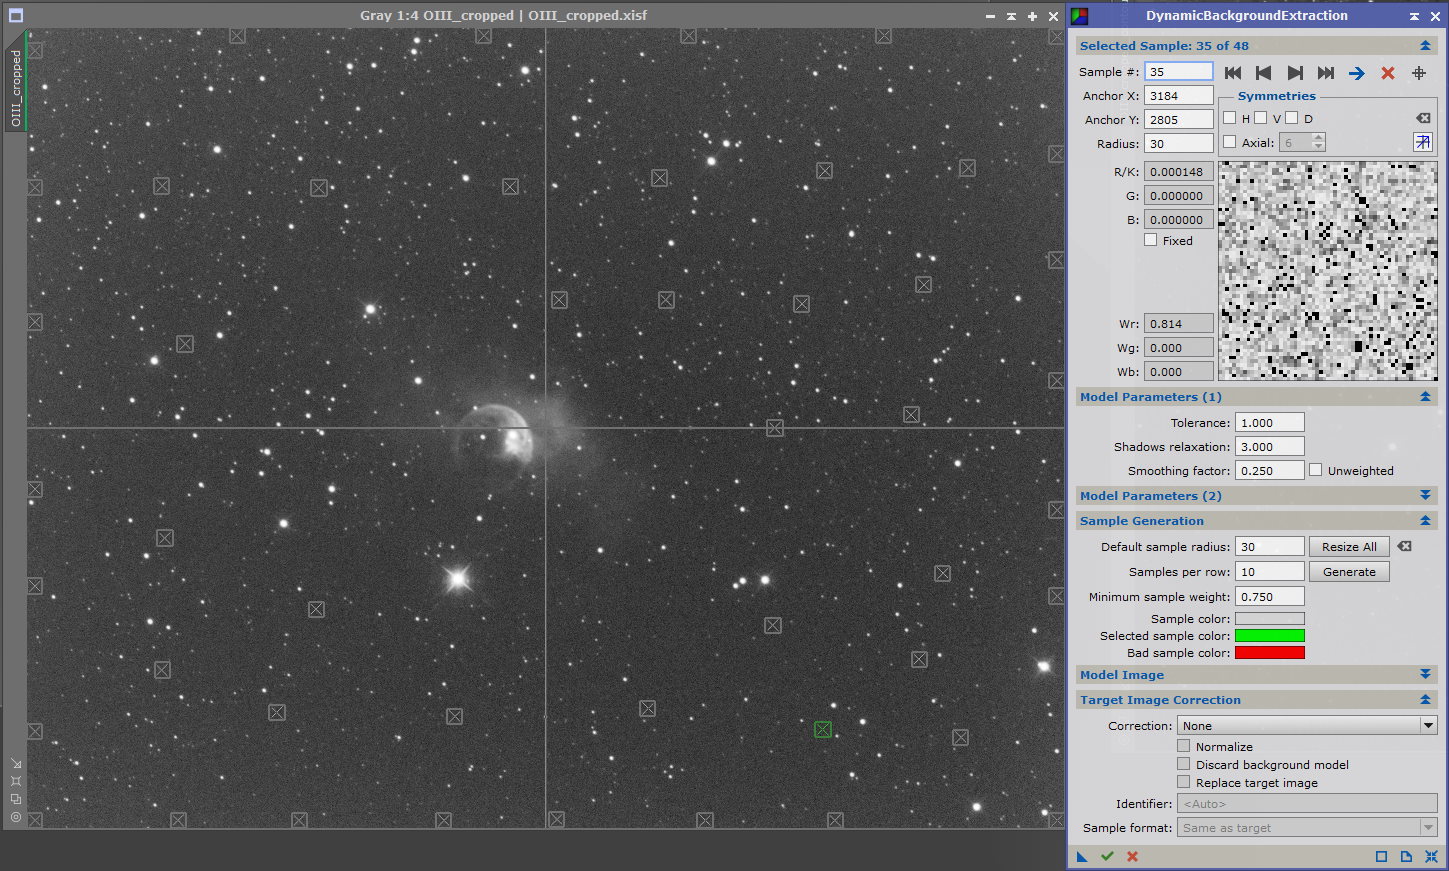
Light pollution (from street lighting etc) and moon glow are a couple of examples of how images can be affected by varying levels of background light during exposure. PixInsight has two tools to deal with this — Automatic Background Extraction (ABE) and Dynamic Background Extraction (DBE). This shows the latter

The sample boxes placed over the background should generate smoothly transitioning levels when looking at the background model (left hand image), and with grey scale images the 'FlatContourPlot' script can help as a comparison with the background model (right hand image). If the level transitions are not smooth then the sample points will need changing or moving. In general the smooth appearance will be achieved by removing the points over the anomalous areas
At this point the process flows for LRGB and narrowband images diverge
LRGB image processing is immediately below and narrowband image processing starts after that
2 — LRGB Linear Fitting
With LRGB images, the next step is to use 'LinearFit' which matches the mean background and signal levels of each of the master images (L, R, G & B) before they are combined into a single colour image. 'LinearFit' needs one of the individual frames to be selected as a reference image to which the others will be corrected, and it's usual to select the one with the most signal. Hover the mouse over the image on the left to see a comparison of the histograms for each filter (green being the strongest)
3 — RGB Combination

This is straightforward, ensure RGB is selected in 'Color Space', assign the correct linear fitted master frames to the respective channels and 'Apply Global (F6)'
4.1 — Deconvolution — PSF Image Creation
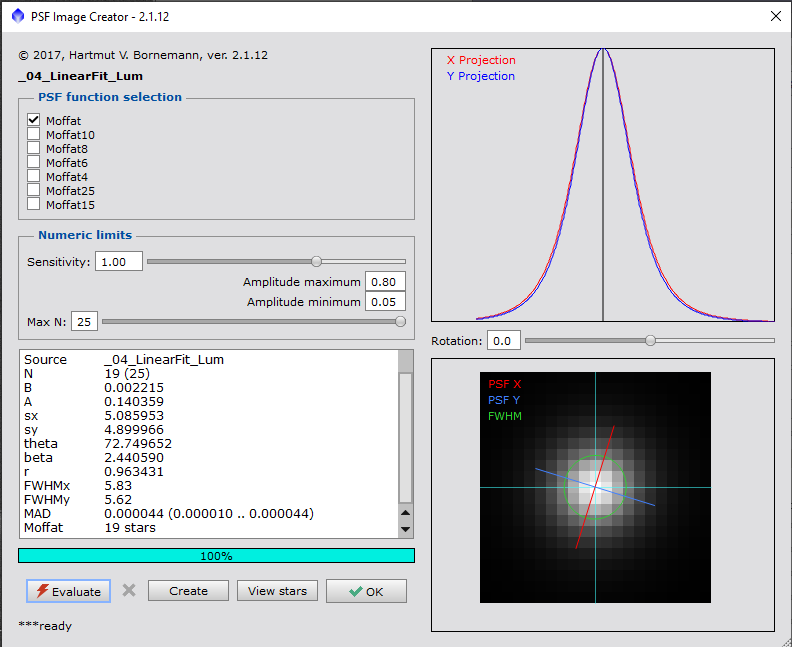
Deconvolution is an optional step that tries to correct for loss of definition from atmospheric distortion, and is only applied to the luminance channel / image. The first step is to create a point spread function image, and it's been made much easier by the introduction of the 'PSFImage' script
4.2 — Deconvolution — Star Mask Creation
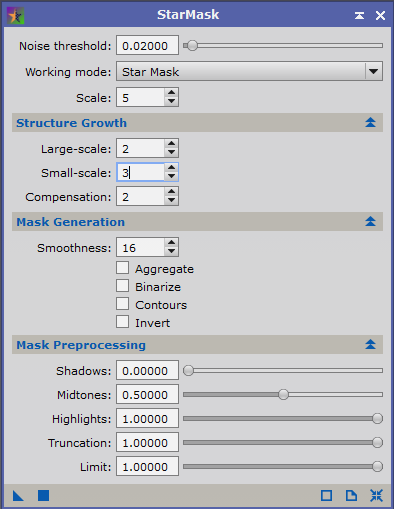
Using the 'StarMask' process, reduce the 'Noise threshold:' to about 0.02 and increase the 'Small–scale Structure Growth' to 3 which should be sufficient to produce a suitable star mask
4.3 — Deconvolution — Background Masking & Deconvolution
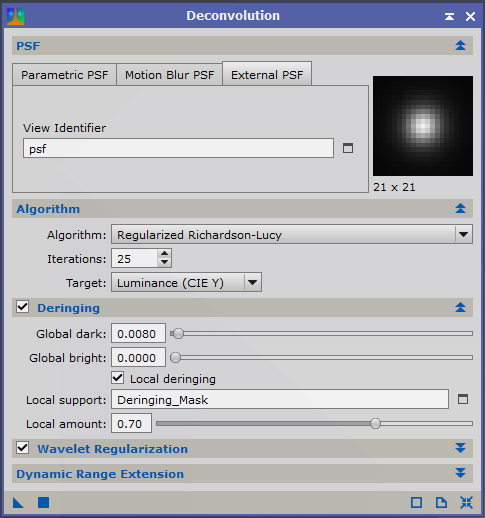
- Create a luminance mask and apply it to the master luminance frame to protect the background
- Open the 'Deconvolution' process
- Select the 'External PSF' tab
- Under 'View Identifier' select the previously created PSF image
- Under 'Algorithm' set the iterations usually between 25 and 50 (but execute the process on previews to find the optimal results)
- Ensure 'Deringing' & 'Local deringing' are selected
- For 'Local support:' select the previously created star mask
- Again using previews, increase 'Global dark:' until ringing is eliminated
Hover the mouse over the image to see the difference
5 — Colour Correction
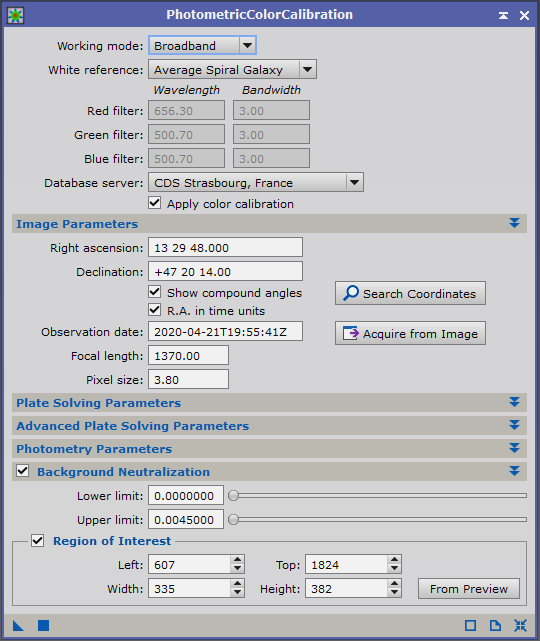
Switching attention back to the RGB master image, this now needs to be colour corrected. The process to do this is 'PhotometricColorCalibration.' This process will also allow background neutralisation to be carried out at the same time. Most of the parameters can be left at the default but it needs a couple of items updating:
- Under 'Image Parameters' all the required data can be extracted from either the existing RGB master or one of the original light frames
- Create a preview of pure background on the RGB master
- Select this preview under 'Region of Interest'
- and run the 'Statistics' process to measure maximum level on the preview
- Set 'Upper limit:' slightly higher than the maximum preview value
- Once the 'PhotometricColorCalibration' process has finished the image can be further corrected by using 'SCNR' to remove any green cast
6 — Noise Reduction
Previously I've used 'MultiscaleLinearTransform' and 'TGVDenoise' but since the introduction of the 'EZ Processing Suite' scripts I've started using 'EZ Denoise', mostly with the default settings, and found it works extremely well in most cases. Applied to both the luminance and RGB master images
7 — Stretching & Combination

In order to get a good balance between the luminance and RGB images when they're combined, the luminance component of the RGB image should match the levels of the luminance image. These steps are taken directly from Juan Conejero's forum post
Apply the initial nonlinear histogram transformations to RGB and L:
- Adjust the L image first, to the desired brightness and contrast
- Then try to match the overall illumination of L when transforming RGB (do it roughly by eye using the CIE L* display mode (Shift+Ctrl+L). Don't try to do it particularly accurate here; the next steps will deal with that)
- Extract the CIE L* component from RGB image with 'ChannelExtraction' (select the CIE L*a*b* space, uncheck a* and b*, and apply to RGB)
- Open 'LinearFit' and select the L image as the reference image
- Apply to the L* component of the RGB image extracted in the previous step
- Reinsert the fitted L* in the RGB image with 'ChannelCombination'
- Now the RGB and L images have been matched very accurately, apply 'LRGBCombination' to the RGB image with only the Luminance selected without changing the luminance transfer function or channel weights (already done by linear fit)